主题
集合 react
安装
先安装
reactshellnpx create-react-app [projectName] [--template typescript]安装
electron和electron-is-devshellnpm install electron concurrently wait-on cross-env --save-dev解析
- concurrently:并行执行管理两条命令
- wait-on:等待一条命令准备完成再执行下一跳命令(先开启
react再开启electron,避免还要刷新electron) - cross-env:跨平台设置环境变量(用于设置
react不在浏览器打开)
安装
electron-is-dev,用于electron判断是不是生产环境shellnpm install electron-is-dev --save在项目文件夹下创建 main.js
jsconst { app, BrowserWindow } = require("electron"); const isDev = require("electron-is-dev"); const { join } = require("path"); let mainWindow; app.on("ready", () => { mainWindow = new BrowserWindow({ width: 1024, height: 680, webPreferences: { nodeIntegration: true, }, }); const urlLocation = isDev ? "http://localhost:3000" : `file://${join(__dirname, "build", "index.html")}`; // 判断是生产环境还是上线环境 mainWindow.loadURL(urlLocation); });修改
package.json在
version下添加json"version": "0.1.0", "main": "main.js", // 添加行在
scripts中添加json"scripts": { // other "dev": "concurrently \"wait-on http://localhost:3000 && electron .\" \"cross-env BROWSER=none npm start\"" // 添加行 }
在 react 中使用 node 的模块,要加 window
jsconst fs = window.require("fs");
打包
安装
electron-buildershellnpm install electron-builder --save-dev完善
package.json的基本信息json"name": "markdown-editor-react", "version": "0.1.0", "main": "main.js", "description": "markdown Editor for learning electron + react", "author": { "name": "kingmusi", "email": "543657931@qq.com" }, "repository": "https://github.com/electron/electron-quick-start", "private": true在
package.json的scripts中添加打包命令json"scripts": { "pack": "electron-builder --dir", "dist": "electron-builder", "prepack": "npm run build", "predist": "npm run build && npm run buildMain" }prepack
- npm 的钩子命令,表示执行
pack前要做的事情
- npm 的钩子命令,表示执行
自定义
main.js的打包在主目录下新建
webpack.config.jsjsconst path = require("path"); module.exports = { target: "electron-main", entry: "./main.js", output: { path: path.resolve(__dirname, "./build"), filename: "main.js", }, node: { __dirname: false, }, };因为上面可看出把
main.js打包到build文件夹里了,所以记得把主渲染进程(main.js)里的 loadURL 修成成对的位置jsurlLocation = isDev ? "http://localhost:3000" : `file://${join(__dirname, "index.html")}`;添加
mian.js的打包命令js"scripts": { "buildMain": "webpack", "prepack": "npm run build && npm run buildMain" }第一次打包的话,会提示是否下载 webpack-cli ,yes 即可
history 路由要添加以下代码才能正确找到文件路径
json"homepage": "./"在主文件下新建
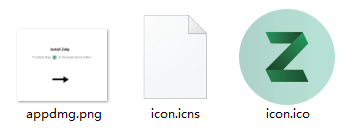
assets文件夹,放置打包需要的静态文件
- 前两个是 mac 安装包用的文件
- 第三个是程序的
icon
添加打包后程序的配置
json"build": { "appId": "markdown-editor-react", "productName": "markdown笔记记录", "copyright": "Copyright © year ${author}", "files": [ "build/**/*", "node_modules/**/*", "settings/**/*", "package.json" ], "directories": { "buildResources": "assets" }, "extraMetadata": { "main": "./build/main.js" }, "extends": null, "mac": { "category": "public.app-category.productivity", "artifactName": "${productName}-${version}-${arch}.${ext}" }, "dmg": { "background": "assets/appdmg.png", "icon": "assets/icon.icns", "iconSize": 100, "contents": [ { "x": 380, "y": 280, "type": "link", "path": "/Applications" }, { "x": 110, "y": 280, "type": "file" } ], "window": { "width": 500, "height": 500 } }, "win": { "target": [ "msi", "nsis" ], "icon": "assets/icon.ico", "artifactName": "${productName}-Web-Setup-${version}.${ext}", "publisherName": "kingmusi" }, "nsis": { "allowToChangeInstallationDirectory": true, "oneClick": false, "perMachine": false } }解析
- appId:打包程序的 id,应该是所有 electron 唯一的
- projectName:程序名称
- files:程序运行要依赖的文件
- settings 是子设置渲染程序的文件入口
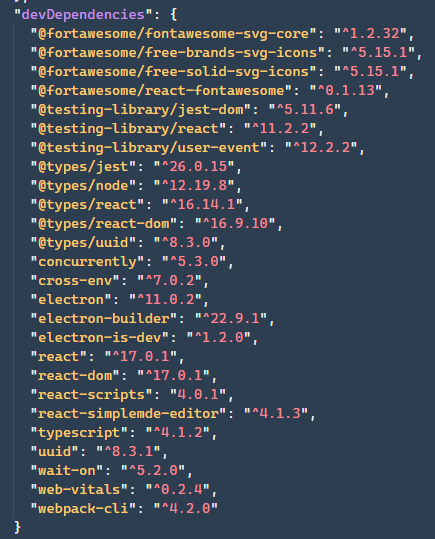
优化:electron-builder 不会打包 devDependencies 里的 modules,但 react 和 electron(main.js)通过 webpack 会自动打包
所以把子渲染程序用到的包(也可添加到 webpack.config.json,自动打包)
和把==除 react 中自己 npm 的,并且 window.require 引入==的包
仍需留在
dependencies外。其他可全部移动到devDependencies中
这样移动打包时可能会找不到包,所以建议删除
node_modules,重新npm install打包程序
shellnpm run pack打包安装包
shellnpm run dist
自动更新
项目和 github 关联
在
package.json的build中添加json"publish": ["github"]在
package.json的scripts中添加shell"release": "electron-builder", "prerelease": "npm run build && npm run buildMain",改变
package.json的version提交到 github 中
运行命令
shellnpm install release然后就可以看到 github 仓库的 release 中有新的版本安装包
